Showing posts with label Amy R "Birthday Sentiments". Show all posts

Saturday, April 7, 2012

Another Zero Birthday......

Hi all.

I hope you are all enjoying the long Easter break. I have so much to show you, so I hope to schedule some fairly regular posts over the next week or so.

Today's card date's back a month or so....yes I am that far behind!!! One of the secretaries at work was about to celebrate a zero birthday. This lady is very elegant and understated. I was asked to make her card that was black and white and nowhere was it to mention her age!!!! Easy right????

I was inspired by this card on SCS.....it fitted the black and white part anyhow. This is the card I made for the birthday girl.....


and I also made one slightly different for the stash......


I think the red just stepped up the sass factor a little. I embossed the stripe...although due to 2 sproggets tearing around...I ended up debossing as opposed to embossing....but it worked out OK.


The swirl is so very intricate and with both rhinestones and pearls it looked so pretty.

The birthday gal loved her card....so I was happy too.

Thanks for popping by. As promised will have more for you all soon.

Stuff Used:
CS: (SU) Basic Black, Whisper White as well as Paper Mill Black and White Paisley Pearl paper and Stardream Deep red paper
Ink: (SU) Basic Black, Cherry Cobbler
Stamps: (SU) Elements of Style and Amy R - Birthday Sentiments
Other bits: SU Square Lattice Embossing Folder, Deep Red 1/2 pearls and Red Rhinestones fm stash

Lynda xx

Sunday, April 1, 2012

Co-ordinated Tulip Fun

Morning all.
Finally (I hear you laud), she has something crafty to show!!!

This is the 2nd of the tulip cards I made for a secretary that I use to work with. We have remained good friends even though I left my old work over 2 1/2 years ago. I went with a favourite colour combo of purples and green.

Here is the card.....


Now....what to give with it.....hmmmmmmmmmmm?? Ever find that you have a gift....and nothing to go with it....well I found a solution!!! I made her a wee note card holder from 2 of the Scallop Envelope dies joined together. What I finally made was a mildly amended version of this. The end result was this..... (front and back)


And side......


It held comfortably 4 note cards that were 3 x 3 inches and 4 envelopes. These were the cards inside. I also stamped the envelopes so they matched.


....and of course the card and gift ready to go......


Needless to say....she loved them. Purely by co-incidence, she had a gift at home that she had forgotten a card for...but now does!!!

Thanks for dropping by. I will try and list all the bits used, but there was a lot. If you have any questions....please ask and I will answer.

Stuff used:
CS: (SU) Pear Pizzaz, Concord Crush, Whisper White, In Colours DSP 6 x 6 stack
Ink: (SU) Pear Pizzaz, Concord Crush
Stamps: (SU) Sweet Summer, So Happy For You and Amy R Birthday Sentiments
Punches: (SU) XL Bird Punch, Dotted Scallop Ribbon Border Punch, Word Window Punch, Modern Label Punch
Dies: (SU) Scallop Envelope Die, Nestabilities Classic Circles and Scallop Circle dies
Other Bits: Dimensionals, Green Diamante Brads fm stash, Green 1/2 rhinestones fm stash, Blender Pen.

Lynda xx

Wednesday, March 7, 2012

Quick and Easy with a Twist

Hi All.

I am so sorry I have been so scarce of late. I cannot believe I have not posted in over 2 weeks. I am in the midst of a FULL on week with multiple birthdays, dental appointments, a funeral and just for good measure...the usual home life stuff that needs to get done.

I have just got something quick for you that was inspired by a card I saw by Angela here. I don't know if it was the CAS aspect or the fact that it looked relatively easy to CASE that got me, but when I had it nearly ready to go, I thought it was missing something. Here is my version......


I kinda stepped it up a bit by busting out my Martha Stewart punch. It fills in the white space just a little more. There is the very narrowest of borders between the punch and the white mat.


Thanks for dropping by. I hope to be a tad more regular in posting soon. I am working on a couple of bigger projects that I look forward to sharing with you very soon.

Stuff used:
CS: (SU) Whisper White, Pink Pirouette, Wild Wasabi and Roman Print White Linen Square Cards
Ink: (SU) Wild Wasabi, Pink Passion (ret)
Stamps: SU Build A Blossom, Amy R "Birthday Sentiments"
Punches: Martha Stewart Double Loop Around The Page Punch, Carla Craft CP8 - Corner Rounder Punch
Other Bits: Dimensionals, Button, 3mm White ribbon

Lynda xx

Saturday, January 7, 2012

Post Christmas Birthdays

Hi All,
I am always on the go around Christmas/New Years as I have quite a few family birthdays immediately after the festive frivolity.

My MIL has her birthday 5 days after Christmas and I wanted to get her something nice, but not overwhelming. It started off with this card. I worked with that and ended up with this.......


Now as you can see the card does not have a sentiment on it ....as I was running horridly behind (so unlike me) and I wanted to get some pics before I lost all light. After the sentiment and finishing touches went on, this is what it looked like...


The card used what I think is called the "Spritz" Technique, whereby you colour the image on the stamp with Stamp and Write Markers and then before stamping onto watercolour paper, you lightly spray it with water. Up close, it really is a beautiful effect.


Part of my new drive is to reload my card stash, so in all I made 4 of these, but with different border punches and I have left the sentiments off so that I can tailor as needed.

Thanks for dropping by, I still have some of my Christmas gifts to show, but I may spread them out a little.

Stuff Used:
CS: (SU) Elegant Eggplant, Orchid Opulence (ret), Eraldo watercolour paper
Ink: (SU) Stamp and Write Markers in Elegant Eggplant, orchid Opulence (ret) and Certainly Celery
Stamps: (SU) Inspired By Nature, Amy R "Birthday Sentiments
Punches: SU large and small Oval Punches, Sizzix Beautiful Wings Embosslit die, MS Gothic Arches Punch
Other Bits: SU Certainly Celery Twill Ribbon

Lynda xx


Thursday, October 13, 2011

Male Sailing

I had some more fun with "Sail Away" a couple of weeks ago, whilst my son was playing baseball. Again, none of these cards are exactly the same, but are the same layout....very basic.

I started with a Sahara Sand base and stamped it with the Weathered BGS. I then co-ordinated it with

Always Artichoke


Chocolate Chip


...and Early Espresso


I also used the Modern Label Punch a little differently in each card.


Now if you also look carefully in the pic above, you will notice that the pattern of the Weathered BGS is at angles. I randomly stamped it diagonally and LOVE the result.

It is always good to have some male cards in the stash....greatly eases the 'freak out' factor when one sneaks up on you!!

Thanks for popping by again.

Stuff used:
CS: (SU) Sahara Sand, Always Artichoke, Chocolate Chip, Early Espresso, Very Vanilla
Ink: (SU) Sahara Sand, Always Artichoke, Chocolate Chip, Early Espresso
Stamps: SU - Sail Away, Weathered BGS, Amy R Sentiments "Birthday Sentiments"
Punches: (SU) Modern Label Punch, Word Window Punch
Other Bits: Dimensionals

Lynda xx


Thursday, September 8, 2011

A Blushing 1st Timer

This is another escapee from my "gunna" file.

NB: The BLUSH in this post refers to that of awkwardness and slight embarrassment

Now as some of you may (or may not) know, I have had a brayer for nearly a year and alas it has not seen the light of day....that is...until recently. I am a MASSIVE fan of the brayering queens out there, and know to emulate such feats is batting WAAAAYYYY above my average. So, to embark on my first brayering foray, I went to Michelle Zindorf and her brayered Golf Card. My FIL is a massive golf fan, so I thought it may be a good idea to try it. (Insert far away and wistful sigh) this is the card I gave to my FIL.....


Now, as you can see, it's slightly different to Michele's card (perhaps for the better), but the brayed section is the same dimension. Given that US/Canadian cards are different sizes to the ones we have here, so I amended things slightly. I was happy with the layout of the card. The sentiment is form my Amy R set and I mounted it on a black oval to carry the theme through. I also carried the golf "dots" through on the background.


The golf ball is on dimensionals, and the shadow is sponged.


The things I have learnt through brayering this card are: # Make sure your post it notes are of a good quality. # Overlap (ever so slightly) the post it marks so that no white lines happen. (Perhaps most importantly) # Start off with an easier project!!

Thanks for enduring to the end of this post. I will be back soon with some other (very much) co-ordinated cards and gifts. Ta so much for popping by again.

Stuff Used:
CS: (SU) Basic Black, Sahara Sand, Whisper White
Ink: (SU) Old Olive, Always Artichoke, Bashful Blue, Not Quite Navy, Versa Black (for golf hole)
Stamps: Amy R - Birthday Sentiments
Punches: CM 1 1/4" Circle Punch, SU Large Oval Punch & Word Window Punch
Other Bits: Cuttlebug Swiss Dots Embossing Folder, Dimensionals, Brayer, Post-it Notes

Lynda xx

Sunday, May 22, 2011

Heartfelt Birthday Wishes

Hi all.

I am so very sorry that I have not kept my promise to post more regularly. There have been spot fires all through this week....and I have struggled to keep to keep on top of them. Posting has not been at the top of the list of late. With all that aside......

The delightful Katie Ridden, whom I met through Crafter's Anonymous last year, celebrated her birthday last week. We have the same (extremely) bent take on the world and share many laughs. She recently took a very brave step and moved from NT to Denmark in WA. I had no idea of Katie's fave colours or stamp set, but I did have so much fun recently playing with Heartfelt Thanks, that I decided to give it another whirl!!! I was quite taken with this card on SCS, but wanted to put my own wee twist on it...and here's what I came up with......


Now yes...you are NOT seeing things....I got my CRIMPER out....shock horror!!!! (now all I need to do is use my brayer that I purchased over 9 months ago and still have not used!!!) Whilst I liked my version of the card...to me it was still missing something....so I did the only thing I cloud...I pimped my own card!!! This is what Katie received.....


I fiddled with the 2nd step of the process a little to make it stand out a little more and added 3 half pearls...and then I was happy!!! I love dry embossing and added with the crimper and the MS punch...it was a tactile joy!!! I also liked the slightly darker outline on the flower.


After Katie had received it (and thankfully loved it) she shared with me that the stamp set I used was the very FIRST one she got through SU....how freaky is that. Just as well I do freaky OK too.

Thanks for popping by again. I really hope that things settle soon for all that I love out there and those whose hearts are heavy. I will be back again real soon.

Stuff used:
CS: (SU) Whisper White, Real Red, Sahara Sand
Ink: (SU) Real Red, Sahara Sand, SWM's in Close To Cocoa and Cherry Cobbler
Stamps: (SU) Heartfelt Thanks, Amy R "Birthday Sentiments Stamps
Other Bits: Cuttlebug Swiss Dots Embossing Folder, Martha Stewart Gothic Arch Punch, Half Pearls fm stash, SU crimper, Dimensionals

Lynda xx

Sunday, May 1, 2011

Vintage Sentiments.....

A short time ago, one of my beautiful blogging buddies celebrated a chronologic advancement in time. She does BEAUTIFUL digi and rubber images. I was trying to think of a card that may meet the high standards she produces herself. I was busting to try out some of my vintage stamps and inks that I got at a craft show (that were gathering dust patiently waiting). The ladies that I am going to show you today are from an English company called Crafty Individuals and these are the gals.....


 Each one of them is just over an inch and a bit square.....or you can stamp them all together. This is my first card that I did with them.....


Very happy with the first attempt as was the recipient (phew). I did realise (too late however) that the flowers should have been set a tad higher so that the card could stand properly!!! Taking this into consideration.....I used the other 2 images and also a different colour palate and made these....


Each card is ever so slightly different. Here are these 3 close up.....


The paper flowers are stamped with a very fine script block stamp and sponged to age them a little. The edges of the CS are also sponged to age them....like this.....


I hope you like them. I had so much fun doing them together. I think you can expect a couple more showings of these ladies.

Stuff used:
CS: (SU) Early Espresso, Bravo Burgundy, Very Vanilla
DP: KaiserCraft - Timeless Collection (Script - P656), Prima - Sparkling Spring Collection (Rosebud - #842673)
Ink: (Tim Holtz Distress Inks) Aged Mahogany, Vintage Photo, Frayed Burlap
Stamps: SU - Best Yet, Amy R - Birthday Sentiments
Punches: (SU) Decorative Label Punch
Other bits: Paper flowers - Prima and Kaiser, Glue dots, Muted Gold and Pink 1/2 pearls

Lynda xx

Wednesday, November 3, 2010

New In Colour Play

During the NRL Grand Final (and Woo Hoo the mighty Dragons won!!) I was up at my bestie's place having a fun weekend of craft and frivolity. She got a lot of scrapping done and I got a heap of cards made. Check out one of her amazing pages here.

I recently aquired the Martha Stewart Deep Trellis and Lace Heart Border (which will feature in an upcoming post) Punches. Have been BUSTING to try them out..and with no kids and no interruptions, I seized my opportunity. I also got a multi pack of the new 2010/11 SU In Colours...and have fallen in LURVE with Concord Crush. You have seen this layout a couple of times previously, but I was really wrapped with the colour combo of Concord Crush, So Saffron and Old Olive. Here are the cards....


Now yes, they are identical with the exception of the sentiment, but doing it this way, I don't feel that I have 2 exactly the same!!

Thanks for popping by again.

Stuff used:
CS: (SU) Concord Crush, Whisper White, Windsor Knot DSP
Ink: (SU) All Markers - Old Olive, Concord Crush, So Saffron
Stamps: (SU) Inspired By Nature, Amy R "Birthday Sentiments
Punches: Martha Stewart Deep Trellis Punch

Lynda xx

Sunday, October 10, 2010

Finally used it!!!!

You may recall sometime back (May this year to be exact) I attended a Crafter's Retreat. Whilst there, I played with the Watercolour Rose Technique. I had previously attended a workshop some time ago under the guidance of Angela Sargeant. This is a beautiful way to colour without the need for much painting ability...hence why I gave it a go!!!! I have had it sitting there patiently waiting for the appropriate occasion to use it.

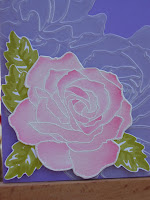
My SIL (#3) was another in the birthday bonanza of September. She is a soft and beautiful soul, so the rose was perfect for her. This is the result....


I used the Manhattan Rose embossing folder to emboss the Vellum and then layered the rose with some leaves from "A Rose is a Rose" stamp set to add a bit of interest. The depth and variation of colour you get with the rose and this technique is magical.


And a couple of obligatory close ups!!!


If you haven't tried this technique, why not give it ago. It's the kind of thing where no two are going to be the same, and if you do an aray of colours...and get caught short for a quick card, it may be what you need.

Thanks for popping by.

Stuff used:
Card: (SU) Lavender Lace, Whisper White, Watercolour Paper, (Non SU) Vellum
Ink: Kixi Kiss, Regal Rose, Reinkers and SWM's in Regal Rose, Pretty in Pink and Pink Pirouette, Versamark
Stamps: (SU) Fifth Avenus Floral, A Rose is a Rose and Amy R "Birthday Sentiments"
Punches: (SU) Scallop Oval and Large Oval Punch
Odd Bits: (SU) Manhattan Rose embossing folder, Dimensionals, Zing White EP

Lynda xx